Data
All the data in the database can be viewed through the Data menu selection. From here, you can view detailed information about each table or collection; use WMS to generate a heatmap of a table with geocoordinates; create, delete, or configure a table; or import data.
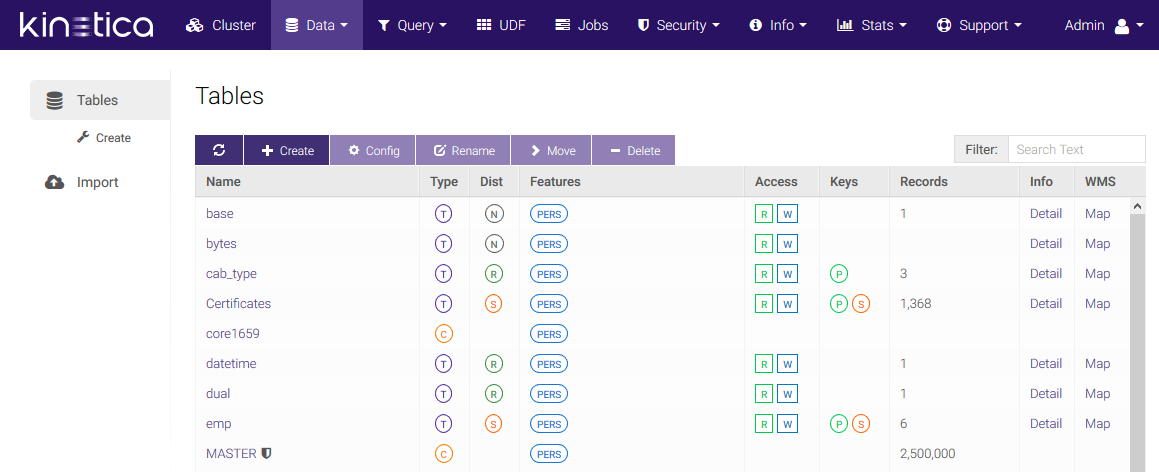
Tables
The Tables page lists all tables and schemas/collections in the database in a grid layout. Also available are the object type (table or collection), type of distribution (replicated, sharded, or neither), feature set (see list below), global access rights (read/write), keys (primary, shard, and foreign) and associated columns, and the record count.
The types of features are as follows:
- PERS (PERSISTED) -- the table exists on disk & in memory (i.e., not memory-only) and will exist across database restarts
- JOIN -- this is a join view
- RESU (RESULT_TABLE) -- results from endpoint operations like Create Projection and Create Union
- VIEW (VIEW) -- this table is a filtered data view
From this page, the following functionality is available:
- Create -- create a new table
- Config -- modify the selected table
- Rename -- rename the selected table
- Move -- create the selected table or view to a different collection
- Delete -- delete the selected table
- Filter -- only display tables matching the given search text
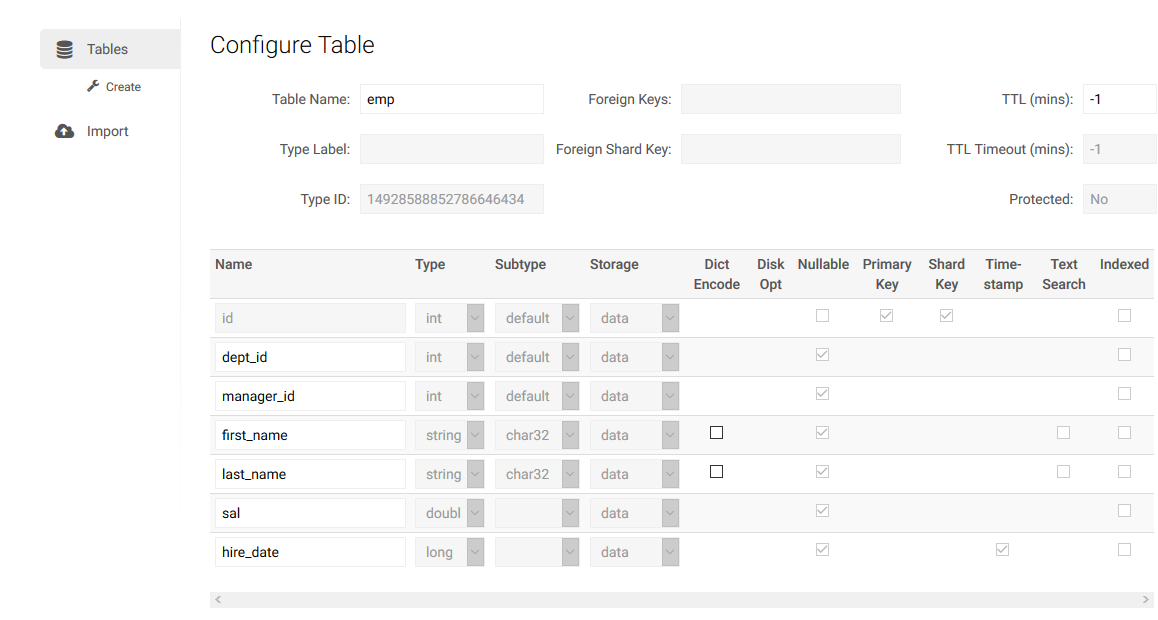
Configuring
To configure an existing table, click Configure, update the table configuration as necessary, and click Apply. Click Reset to discard any pending modifications.
Allowed modifications include:
- Renaming the table
- Modifying the TTL
- Renaming the columns
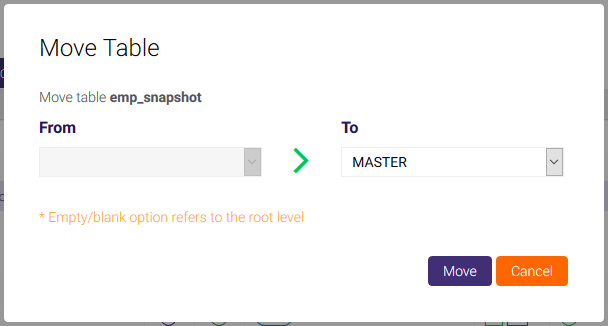
Moving
To move a table to another collection, select a table (or tables) then click Move. Select which collection to move the table(s) to (the blank option is the root-level collection) and click Move.
Deleting
To delete a table, select a table (avoid clicking the table's name, as it will open the Data Grid page) then click Delete and confirm the deletion of the selected table.
Detailed Table Information
To view table information, click Detail in the Info column.

The column grid can be exported to CSV by clicking Export CSV.
WMS
If your data contains geocoordinates, you can use the Map link in
the WMS column to view a map of the data. Kinetica will use x,
y, and wkt columns to populate the map with points or WKT objects
(depending on whether Heatmap or Feature is selected).
Note
This function only works on GPU-based instances of Kinetica.
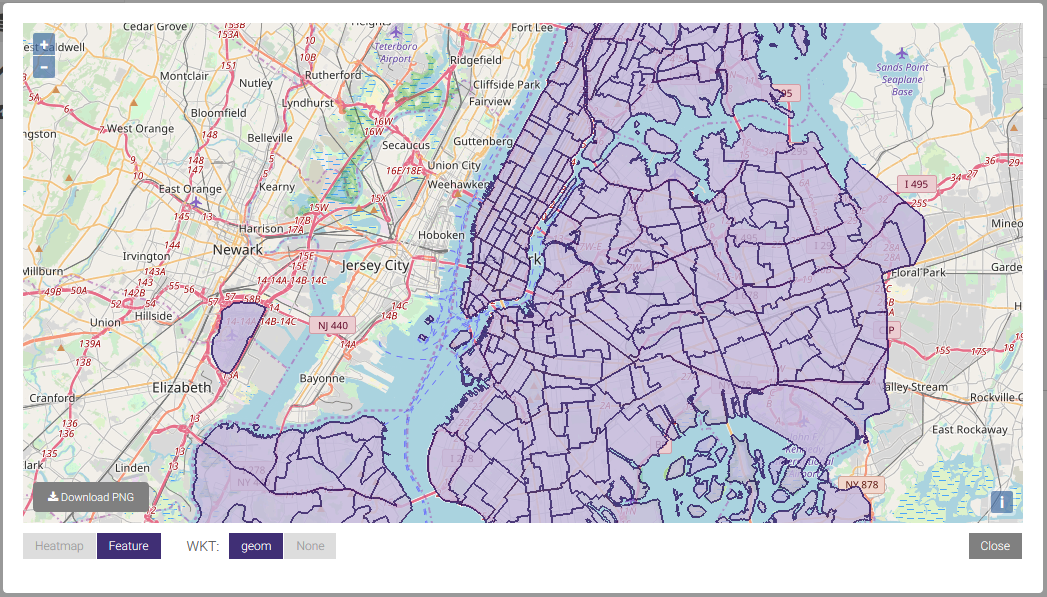
You can use the + / - on the left or the scroll wheel of your mouse to zoom in and out of an area. You can also download the map.
Note
The map will default to Heatmap mode. To render full WKT geometry, click Feature.
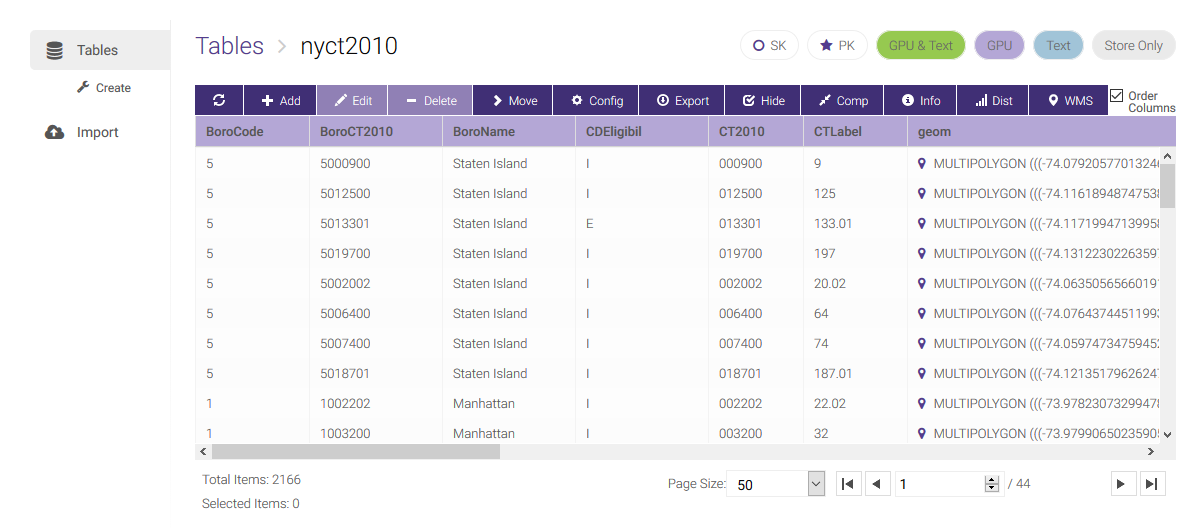
Data Grid
To view the individual records in a table, click on the table name. This will display the data grid page. From here, the following functionality is available:
- Add -- insert a new record
- Edit -- modify the selected record
- Delete -- delete the selected record
- Move -- move the table or view to a different collection
- Config -- modify the table or view
- Export -- export data to CSV
- Hide -- hide displayed columns within the grid
- Comp -- compress individual individual columns of data in memory; see Compression for details
- Info -- display table detail
- Dist -- display cross-node data distribution graph
- WMS -- plot data from tables with geospatial data on a map
Export Data
From the data grid page, select Export. You will have the option to export all of the data or records within a range.
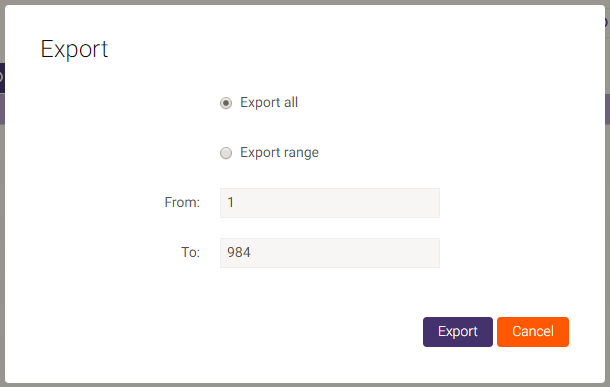
Once you click the Export button, the data will be downloaded to your computer. The exported data is in a CSV format, with the first line being the table schema. The schema includes the name, data type, and any additional properties for each field.

Note
Null values are represented as \N. This can be changed by
modifying the data_file_string_null_value parameter in
/opt/gpudb/tomcat/webapps/gadmin/WEB-INF/classes/gaia.properties.
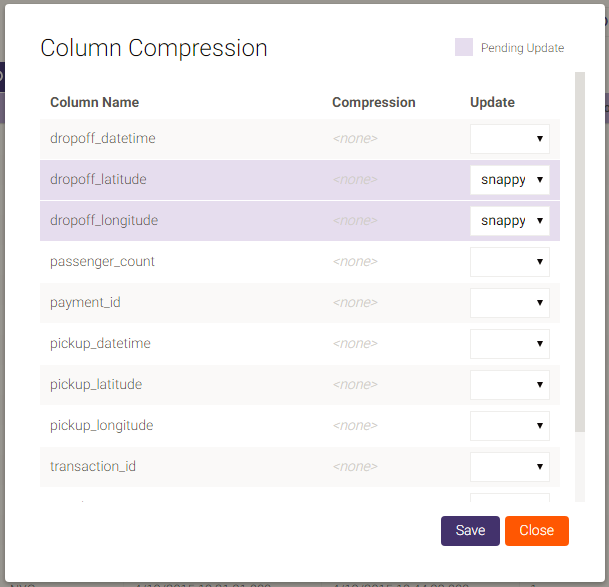
Compression
In addition to using the API to set compression, you can set it by clicking Comp on the data grid page, opening up the Column Compression dialog. Each column will be shown with its current compression setting under Compression and a selectable new compression setting under Update. After compression adjustments have been made, click Save to put those changes into effect. See Compression for more detail on compression and compression types.
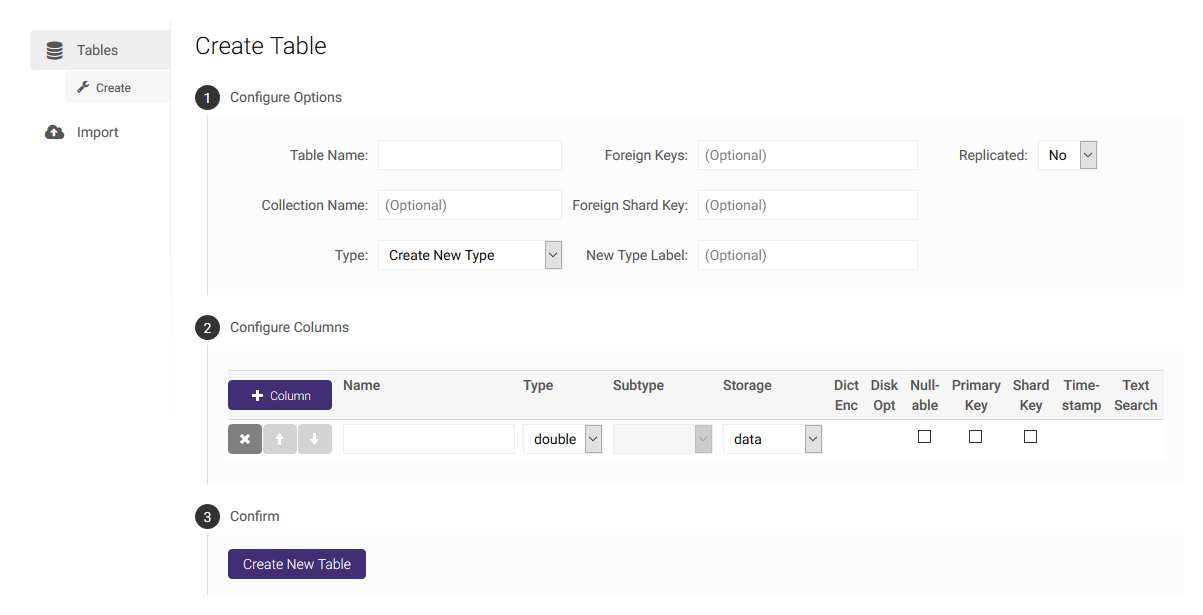
Create
A table can be created by clicking on Create on the left menu to navigate to the Create Table page. After configuring the name, containing collection name, distribution scheme, keys, and column set, click Create New Table.
Import
Data can be imported from a CSV file on the Import page.
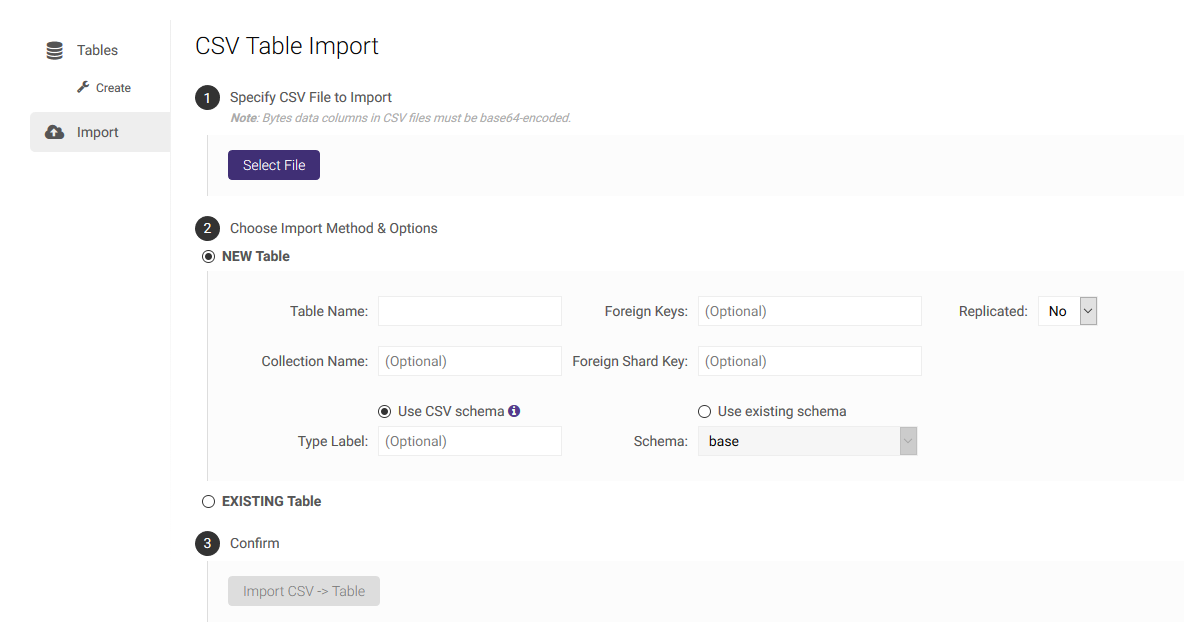
On this screen, you must upload a file using the Choose file button and choose whether to import the data into a new table or one that already exists. If you want to create a new table, you must specify the table name, whether to use an existing schema or the schema from the first row of the CSV file (as described in Export Data). If you want to import data into a table that already exists, you just need to specify the table name. When ready, click Import CSV->Table and the system will provide feedback as it is importing the data.