- Import - contains the 5-step process for importing files from KiFS
- History - lists all of your previous KiFS import attempts
Import Overview
When importing, the following five steps will need to be completed: At any step, the following actions are available at the bottom of the screen:- Next - proceed to the next step
- Back - return to the previous step
- Cancel - exit the import process
- Import - once enough information has been specified to begin importing data, the Import button will become active
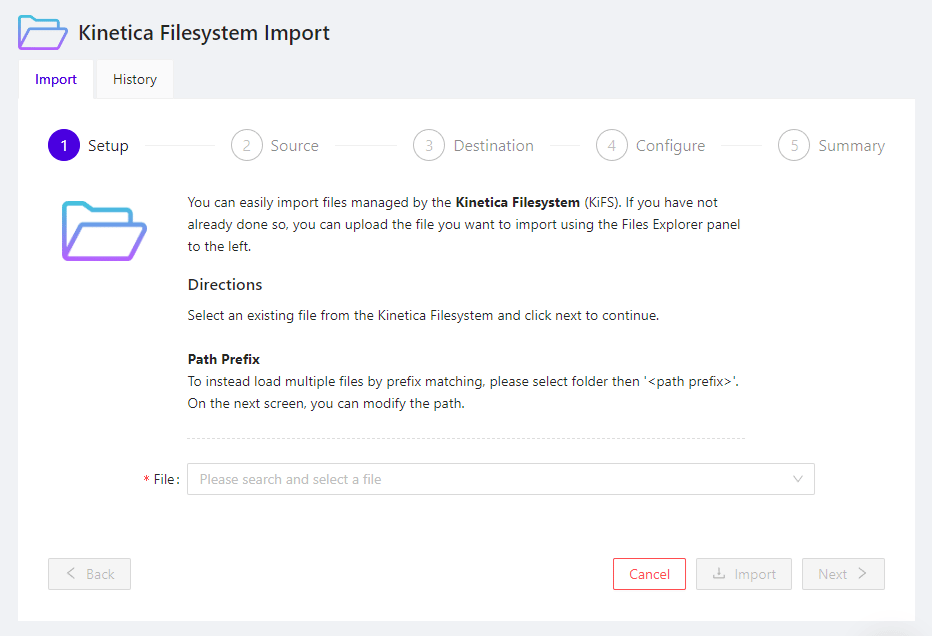
Setup
In this step, the file to import from KiFS is selected.- File - click the control to open the KiFS file selector, which shows a list of the KiFS directories, and as each is clicked, the files contained within that directory; click any file to select for import
Source
In this step, the parser is configured for the selected KiFS file.- Source - pre-selected as Kinetica Filesystem
- File Path - pre-selected as a KiFS reference to the file chosen in the previous step
- Format - select the format of the KiFS file from the drop-down
-
Delimiter - select the character that delimits field values
in the source file:
|- default delimiter for .psv (pipe-separated value) files\t- (tab) default delimiter for .tsv (tab-separated value) files,- default delimiter for .csv (comma-separated value) files and all other types of text files
-
Escape Character - select the character used to escape
special characters (like the field delimiter) found within field values; e.g.,
a
\might be used to escape commas within field values in a .csv file - Comment Identifier - select the character(s) with which comment lines within the source file begin
-
Quote Character - select the character used to quote field
values; e.g., a
"might be used to quote field values containing commas in a .csv file - Null Identifier - select the character(s) used to identify null field values
- Has Header - check the box if the source file contains a header row at the top
Destination
In this step, the target table to import into is selected.- Schema - name of the schema containing the target table; if blank, the user’s default schema will be used
- Table - name of the target table, which must meet table naming criteria; Workbench will suggest a table name here, if possible
- Batch Size - number of records from the source to insert into the database at a time; this can be used to tune the ingest speed for source data with many records or wide columns
- Abort on Error - check, to have the import stop at the first record import failure; any records imported by this point will remain in the target table
-
Bad Records Table - when Abort on Error
is unchecked, the errant records will be written to the specified table
- Schema - schema in which the bad records table should reside
- Table - name for the bad records table
Configure
In this step, the target table’s structure can be specified, if the table does not exist. Not specifying any structure will cause the import process to infer the table’s structure from the source data. To specify a table structure, click + Add Column once for each field in the source data, then enter the specification for each column, including:- Name - name of the column, which must meet the standard naming criteria
- Type - type of the column, and sub-type, if applicable
- Nullable - check the box if the column should allow null values
-
Properties - check any properties that should apply to this
column:
- Primary Key - make this column the primary key or part of a composite primary key
- Shard Key - make this column the shard key or part of a composite shard key
- Dict. Encoded - apply dictionary encoding to the column’s values, reducing storage used for columns with more often repeated data
- Init. with Now - replace empty or invalid values inserted into this column with the current date/time
- Init. with UUID - replace empty values inserted into this column with a universally unique identifier (UUID)
- Text Search - make this column full-text searchable, using FILTER_BY_STRING in search mode