AWS Marketplace Installation
Kinetica can be installed and configured via the AWS Marketplace.
Important
Currently, there are only CUDA Kinetica Amazon Machine Images (AMIs) available.
Prerequisites
Acquire License
Installing the Kinetica AMI via the AWS Marketplace requires a license key. To receive a license key, contact support at support@kinetica.com.
Setup Key Pair
If you want to be able to SSH into the AWS instance after Kinetica is installed and to perform the Console Initialization, a key pair is necessary. To create a new key pair:
- Log into the AWS console and navigate to the EC2 dashboard.
- Under NETWORK & SECURITY in the left-hand side-menu, click Key Pairs.
- Type a name for the key and click Create. A PEM file download window appears.
- Save the file to your local machine.
Networking Configuration
The database will require a number of ports to be open to communicate to its applications and services. It's important to know about these ports and what they're used for so the security group for your instance(s) can be properly configured.
Default Ports
The default ports used for communication with Kinetica (and between servers, if operating in a cluster) follow. The Nodes column will list either Head--that the corresponding port only needs to be opened on the head node, or All--that the corresponding port needs to be opened on the head node & worker nodes.
| Port | Function | Nodes | Usage |
|---|---|---|---|
| 2003 | This port must be open to collect the runtime system statistics. | Head | Required Internally |
| 4000+N | For installations which have the external text search
server enabled and communicating over TCP
(rankN.text_index_address = tcp://…), there will be
one instance of the text search server listening for each
rank on every server in the cluster. Each of these
daemons will be listening on a port starting at 4000 on
each server and incrementing by one for each additional
rank. |
All | Optional Internally |
| 5552 | Host Manager status notification channel | All | Required Internally |
| 5553 | Host Manager message publishing channel | All | Required Internally |
| 6555+N | Provides distributed processing of communications between
the network and different ranks used in Kinetica. There
is one port for each rank running on each server,
starting on each server at port 6555 and incrementing
by one for each additional rank. |
All | Required Internally |
| 8080 | The Tomcat listener for the Kinetica Administration Application (GAdmin) | Head | Optional Externally |
| 8082 | In installations where users need to be authenticated to
access the database, a preconfigured HTTPd instance listens
on this port, which will authenticate incoming HTTP
requests before passing them along to Kinetica. When
authorization is required, all requests to Kinetica
should be sent here, rather than the standard 9191+
ports. |
All | Optional Externally |
| 8088 | This is the port on which Kinetica Reveal is exposed. For installations which have this feature enabled, it should be exposed to users. | Head | Optional Externally |
| 8181 | This is the port used to host the system and process stats server | Head | Optional Externally |
| 9001 | Database trigger ZMQ publishing server port. Users of database triggers will need the ability to connect to this port to receive data generated via the trigger. | Head | Optional Externally |
| 9002 | Table monitor publishing server port. Users of database table monitors will need the ability to connect to this port to receive data generated via the table monitor. | Head | Optional Externally |
| 9191+N | The primary port(s) used for public and internal Kinetica
communications. There is one port for each rank running
on each server, starting on each server at port 9191
and incrementing by one for each additional rank. These
should be exposed for any system using the Kinetica APIs
without authorization and must be exposed between all
servers in the cluster. For installations where users
should be authenticated, these ports should NOT be
exposed publicly, but still should be exposed between
servers within the cluster. |
All | Required Internally, Optional Externally |
| 9292 | Port on which the ODBC Server listens for connections | Head | Optional Externally |
| 9300 | Port used to query Host Manager for status | All | Required Internally |
Port Usage Scenarios
Kinetica highly encourages that proper firewalls be maintained and used to protect the database and the network at large. A full tutorial on how to properly set up a firewall is beyond the scope of this document, but the following are some best practices and starting points for more research.
All machines connected to the Internet at large should be protected from intrusion. As shown in the list above, there are no ports which are necessarily required to be accessible from outside of a trusted network, so we recommend only opening ports to the Internet and/or untrusted network(s) which are truly needed based on requirements.
There are some common scenarios which can act as guidelines on which ports should be available.
Connection to the Internet
If Kinetica is running on a server where it will be accessible to the Internet
at large, it is our strong suggestion that security and authentication be used
and ports 9191+N and 8080 are NOT exposed to the public, if
possible. Those ports can potentially allow users to run commands anonymously
and unless security is configured to prevent it, any users connecting to them
will have full control of the database.
Dependence on Kinetica via the API
For applications in which requests are being made to Kinetica via client APIs
that do not use authentication, the 9191+N ports should be made available to
the relevant set of servers. For applications using authentication via the
bundled version of httpd, port 8082 should be opened. It is possible to
have both ports open at the same time in cases where anonymous access is
permitted, however the security settings should be carefully set in this case to
ensure that anonymous users have the appropriate access limitations.
Additionally, if the API client is using table monitors or triggers, ports
9001 and/or 9002 should also be opened as needed.
Reveal
In cases where the GUI interface to Reveal is required, the 8088
port should be made available.
Administration
System administrators may wish to have access to the administrative web
interface, in which case port 8080 should be opened, but carefully
controlled.
Install Kinetica AMI
Navigate to the Kinetica AMI page in the AWS Marketplace.
Click Continue to Subscribe in the top right corner of the page.
Note
It may take a minute for the subscription to process.
When the subscription is successful, click Continue to Configuration in the top right corner of the page.
Select a Software Version from the drop-down menu. We recommend the latest version of Kinetica.
Select a Region from the drop-down menu.
Click Continue to Launch at the top of the page.
Review your selections and select Launch through EC2 from the Choose Action drop-down menu.
Click Launch. You'll be taken to the EC2 Management Console.
Select a p2 instance type from the table (e.g., p2.xlarge, p2.8xlarge, p2.16xlarge), then click Next: Configure Instance Details in the bottom right corner.
Type the number of instances necessary;
1for single node setup or2+ for multi-node setup. Adjust the rest of the default instance details as necessary, then click Next: Add Storage.Adjust the storage available on your instance(s), keeping in mind the minimum storage requirements for Kinetica, then click Next: Add Tags.
Add tags as desired, then click Next: Configure Security Group.
Opt to create a new security group or select an existing group. If creating a new security group, configure the default settings as necessary.
Important
Note that the default Kinetica AMI security group does not allow any traffic to port
9191(or9191+N, whereNis number of nodes, for multi-node setups), but it does allow all traffic to ports8080and8088, meaning someone could access your data. For more information on adjusting access to your instances, see the AWS EC2 documentation.Click Review and Launch.
Review the configurations, edit as necessary, then click Launch.
Select a key pair, then select the acknowledgement checkbox. Click Launch Instances.
Note
It may take a while for the instance to be fully up and running.
Configure
Initialization
Once the application has been deployed, choose the configuration method:
- Visual Initialization - using a web browser
- Console Initialization - using a console
Visual Initialization
The Visual Installer is run through the Kinetica Administration Application (GAdmin) and simplifies the installation of Kinetica across a cluster.
Navigate to the Instances page of the EC2 Management Console and find the instances you just launched. Designate the first instance in the table as your head node. Find its Instance ID and Public IP Address, which will be used later.
Browse to the instance using the head node's public IP:
http://<head-node-ip-address>:8080
Log into the admin application
- Enter Username:
admin - Enter Password:
<head-node-aws-instance-id> - Click Login
- Enter Username:
A Product Activation page will be displayed, where the license key is to be entered:
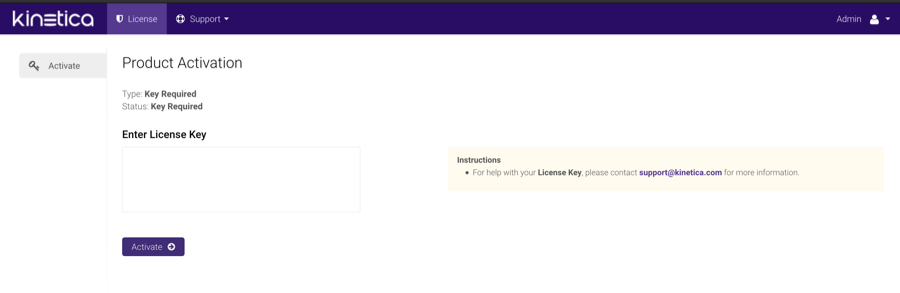
- Enter the license key under Enter License Key
- When complete, click Activate, then confirm the activation
At the Setup Wizard page, configure the system basics:
Enter the IP Address and number of GPUs for each server in the cluster
Optionally, select the Public Head IP Address checkbox and update the address as necessary
The license key under Configure License Key should already be populated
When complete, click Next Step.
Edit the configuration file as necessary, then click Save.
Important
For additional configuration options, see the Configuration Reference.
When complete, click Save
Important
For additional configuration options, see the Configuration Reference.
Start the system. This will start all Kinetica processes on the head node, and if in a clustered environment, the corresponding processes on the worker nodes.
- Click Admin on the left menu
- Click Start.
Follow instructions here to update the administration account's password.
Console Initialization
System configuration is done primarily through the configuration file
/opt/gpudb/core/etc/gpudb.conf, and while all nodes in a cluster have
this file, only the copy on the head node needs to be modified.
Important
Only edit the /opt/gpudb/core/etc/gpudb.conf on the
head node. Editing the file on worker nodes is not supported and may
lead to unexpected results.
Navigate to the Instances page of the EC2 Management Console. Designate the first instance in the table as your head node. Find its Public DNS Name, Instance ID, and Public IP Address, which will be used later.
In a local terminal, navigate to the private key file you used to create the instance(s).
Update the permissions of the file so that it can only be used by you:
chmod 400 <key-name>.pem
SSH into the head node:
ssh -i <key-name>.pem kinetica@<head-node-public-dns-name>
Open
/opt/gpudb/core/etc/gpudb.confin an editor.Specify the head node IP address, the total number of database ranks, and the distribution of ranks across hosts. In this example, there are two servers with three ranks on the first and two ranks on the second:
number_of_ranks = 5

rank0.host = 172.123.45.67
rank1.host = 172.123.45.67
rank2.host = 172.123.45.67
rank3.host = 172.123.45.68
rank4.host = 172.123.45.68

head_ip_address = 172.123.45.67
For CUDA builds, the GPUs need to be assigned to ranks. To display the installed GPUs and their status run:
nvidia-smi
Once the number of GPUs on each server has been established, enter them into the configuration file by associated rank. In this example, there are two servers with a GPU assigned to each of two ranks per host (none for rank0):
rank0.gpu = 0 # This GPU can be shared with a worker rank, typically rank 1.

rank1.taskcalc_gpu = 0
rank2.taskcalc_gpu = 1
rank3.taskcalc_gpu = 0 # On new host, restart at 0
rank4.taskcalc_gpu = 1
Determine the directory in which database files will be stored. It should meet the following criteria:
- Available disk space that is 4x memory
- Writable by the
gpudbuser - Consist of raided SSDs
- Not be part of a network share or NFS mount
Enter the database file directory path into the configuration:
persist_directory = /opt/gpudb/persist
Set the license key:
license_key = <key>
Important
For additional configuration options, see the Configuration Reference.
Save the file.
Start the
gpudbservice. This will start all Kinetica processes on the head node, and if in a clustered environment, processes on the worker nodes:service gpudb start
Log into the admin application
- Enter Username:
admin - Enter Password:
<head-node-aws-instance-id> - Click Login
- Enter Username:
Follow instructions here to update the administration account's password.
Swap Space
It's recommended that swap space equal to 25-50% of the available memory of a machine is available to avoid disk spilling and out-of-memory issues.
Check if there is active swap using the command:
free -h
              total        used        free      shared  buff/cache   available
Mem:            15G        2.0G        5.3G         32M        8.2G         13G
Swap:          6.5G          0B        6.5G
To create a new swap file:
As root, run the
ddcommand withbsset to the desired read and write limit in bytes (usually 1024) andcountset to the desired file size in megabytes:sudo dd if=/dev/zero of=</swapfile/path> bs=1024 count=<file-size>
Make the file only accessible to root
sudo chmod 600 </swapfile/path>
Mark the file as swap space:
sudo mkswap </swapfile/path>
Enable the swap file:
sudo swapon </swapfile/path>
Backup the
/etc/fstabfile and then add the swap file to it to make the swap file permanent:sudo cp /etc/fstab /etc/fstab.bak echo `</swapfile/path> none swap sw 0 0` | sudo tee -a /etc/fstab
Passwordless SSH
If Kinetica is installed in a clustered environment, configuring passwordless
SSH will make management considerably easier. Run the following command on the
head node to set up passwordless SSH between the head node and the
worker nodes for the gpudb users created during deployment:
sudo /opt/gpudb/core/bin/gpudb_hosts_ssh_copy_id.sh
If necessary, you can copy SSH public keys for non-gpudb users to all the
hosts in a cluster (made available with gpudb_hosts_addresses.sh) using the
ssh-copy-id tool that is part of OpenSSH:
ssh-copy-id -i ~/.ssh/<public_key_name> <user>@<hostname>
Validation
To validate that Kinetica has been installed and started properly, you can perform the following tests.
Curl Test
To ensure that Kinetica has started (you may have to wait a moment while the system initializes), you can run curl on the head node to check if the server is responding and port is available with respect to any running firewalls:
$ curl localhost:9191
Kinetica is running!
API Test
You can also run a test to ensure that the API is responding properly. There is an admin simulator project in Python provided with the Python API, which pulls statistics from the Kinetica instance. Running this on the head node, you should see:
$ /opt/gpudb/bin/gpudb_python /opt/gpudb/kitools/gadmin_sim.py
**********************
Total tables:              0
Total top-level tables:    0
Total collections:         0
Total number of elements:  0
Total number of objects:   0
GAdmin Status Check
The administrative interface itself can be used to validate that the system is functioning properly. Simply log into GAdmin. Browse to Dashboard to view the status of the overall system and Ranks to view the status breakdown by rank.
Ingest/Read Check
After verifying Kinetica has started and its components work, you should confirm ingesting and reading data works as expected.
- Navigate to the Demo tab on the Cluster page.
- Click Load Sample Data under the NYC Taxi section. Confirm the data loading.
- Once the data is finished loading, click View Loaded Data. The
data should be available in the
nyctaxitable located in theMASTERcollection.
If Reveal is enabled:
Navigate to:
http://<head-node-ip-address>:8088/
Log into Reveal and change the administration account's default password.
Click NYC Taxi under Dashboards. The default NYC Taxi dashboard should load.
Core Utilities
Kinetica comes packaged with many helpful server and support executables that
can be found in /opt/gpudb/core/bin/ and /opt/gpudb/bin. Note that any
of the gpudb_hosts_*.sh scripts will operate on the hosts specified in
gpudb.conf. Run any of the following with the -h option for usage
information.
Important
For most of the utilities that use passwordless SSH, an AWS PEM
file can be specified instead using the -i option (with the exception
being the gpudb_hosts_persist_* scripts). If passwordless SSH is not
setup and no PEM file is specified, you will be prompted for a password
on each host.
Environment Configuration and Tools
Some of the most commonly used and important utilities are also available in the
/opt/gpudb/bin directory.
Note
This directory also contains the KI Tools suite
| Utility / Script | Uses Passwordless SSH | Description |
|---|---|---|
gpudb_env |
No | Utility to run a program and its given arguments after setting the PATH, LD_LIBRARY_PATH, PYTHON_PATH,
and others to the appropriate /opt/gpudb/ directories. Use this script or /opt/gpudb/bin/gpudb_python to
correctly setup the environment to run Kinetica's packaged Python version. You can also run
source /opt/gpudb/core/bin/gpudb_env.sh to have the current environment updated. |
gpudb_pip |
Yes | Script to run Kinetica's packaged pip version. Runs on all hosts. This can be used in place of pip,
e.g., /opt/gpudb/bin/gpudb_pip install gpudb |
gpudb_python |
No | Script to correctly setup the environment to run Kinetica's packaged Python version. This can be used in place
of the python command, e.g., /opt/gpubd/bin/gpudb_python my_python_file.py |
gpudb_udf_distribute_thirdparty |
No | Utility to mirror the local /opt/gpudb/udf/thirdparty to remote hosts. Creates a dated backup on the remote
host before copying |
Helper Scripts
Additional helper scripts and utilities are available in
/opt/gpudb/core/bin.
| Utility / Script | Uses Passwordless SSH | Description |
|---|---|---|
gpudb |
No | Run as gpudb user or root. The Kinetica system start/restart/stop/status script |
gpudb_cluster_cuda |
No | Server executable for CUDA clusters. Displays version and configuration information. This should only be run
by the gpudb executable (see above). |
gpudb_cluster_intel |
No | Server executable for Intel clusters. Displays version and configuration information. This should only be
run by the gpudb executable (see above). |
gpudb_config_compare.py |
No | Script to compare two configuration files: a "modified" configuration file and a "baseline" configuration file.
The script can also merge the files after outputting the diff. The merged file will use the "modified" file's
settings values if the "modified" configuration settings match the "baseline" configuration settings; if a setting
value is present in the "modified" file but not in the "baseline" file, the "baseline" setting value will be
used. Supports .ini, .conf, .config, .py, and .json files. |
gpudb_conf_parser.py |
No | Run using /opt/gpudb/bin/gpudb_python. Utility for parsing .ini files for scripts |
gpudb_env.sh |
No | Utility to run a program and its given arguments after setting the PATH, LD_LIBRARY_PATH, PYTHON_PATH,
and others to the appropriate /opt/gpudb/ directories. Use this script or /opt/gpudb/bin/gpudb_python to
correctly setup the environment to setup the environment to run Kinetica's packaged Python version. You can
also run source /opt/gpudb/core/bin/gpudb_env.sh to have the current environment updated. |
gpudb_host_manager |
No | The host daemon process that starts and manages any Kinetica processes. |
gpudb_host_setup.sh |
No | Run as root. This script will set the OS configuration to an optimal state for Kinetica. |
gpudb_hosts_addresses.sh |
Yes | Prints all the unique hostnames (or IPs) specified in gpudb.conf |
gpudb_hosts_diff_file.sh |
Yes | Run as gpudb user or root. Utility to diff a given file from the current machine to the specified destination
file on one or more hosts |
gpudb_hosts_logfile_cleanup.sh |
Yes | Run as gpudb user or root. Script to delete old log files and optionally keep the last n logs |
gpudb_hosts_persist_clear.sh |
Yes | Run as Important: Only run this while the database is stopped. |
gpudb_hosts_persist_init_encryption.sh |
Yes | Run as gpudb user. Clear the persist directories (specified in gpudb.conf) and initialize them to be
encrypted |
gpudb_hosts_persist_mount_encryption.sh |
Yes | Run as gpudb user. Script to mount the already-initialized, encrypted persist directories (specified in
gpudb.conf). If an encrypted persist directory is detected and the gpudb.conf parameter
persist_encryption_pass_command is valid, the gpudb executable (see above) will automatically mount the
persist directory using this command if it was not mounted already. |
gpudb_hosts_persist_umount_encryption.sh |
Yes | Run as gpudb user. Script to unmount the already-mounted, encrpyted persist directories (specified in
gpudb.conf). If the gpudb.conf parameter persist_encryption_pass_command is valid, the persist
directories will be unmounted by the gpudb executable (see above) when the database has stopped. |
gpudb_hosts_rsync_to.sh |
Yes | Run as gpudb user. Script to copy files from this server to the remove servers using rsync |
gpudb_hosts_ssh_copy_id.sh |
Yes | Run as Important: This script should be re-run after changing the host configuration to redistribute the keys |
gpudb_hosts_ssh_execute.sh |
Yes | Run as gpudb user or root. Script to execute a program with arguments on all hosts specified in
gpudb.conf, e.g., ./gpudb_hosts_ssh_execute.sh "ps aux" or ./gpudb_hosts_ssh_execute.sh "hostname" |
gpudb_keygen |
No | Executable to generate and print a machine key. You can use the key to obtain a license from support@kinetica.com |
gpudb_logger.sh |
No | Rolling logger utility to help manage the size and number of logs available |
gpudb_log_plot_job_completed_time.sh |
No | Plots job completion time statistics using gnuplot |
gpudb_machine_info.sh |
No | Script to print OS config information that affects performance as well as suggestions to improve performance |
gpudb_nvidia_setup.sh |
No | Utility to configure the Nvidia GPU devices for best performance or restore defaults. Root permission is required to change values. Utility reports informational settings and permission errors when run as user |
gpudb_open_files.sh |
No | Script to print the files currently open by the database |
gpudb_process_monitor.py |
No | Script to check a process list against a matching regular expression and print a log to stdout when the process is started or stopped. The script can also run a program, send emails, and/or SNMP alerts when the process starts or stops. The script can be configured using a configuration file, but note that some settings can be overriden from the command line. |
gpudb_sysinfo.sh |
No | More information when run as root. Script to print a variety of information about the system and hardware for
debugging. You can also make a .tgz file of the output. Rerun this program as needed to keep records of
the system. Use a visual diff program to compare two or more system catalogs |
gpudb_test_start_stop.sh |
No | Script to test starting and stopping all Kinetica components. |
gpudb_udf_distribute_thirdparty.sh |
Yes | Utility to mirror the local /opt/gpudb/udf/thirdparty to remote hosts. Creates a dated backup on the remote
host before copying |
gpudb_useradd.sh |
No | Script to create the gpudb:gpudb and gpudb_proc:gpudb_proc user:groups and SSH id. This script can be
rerun as needed to restore the user:groups and ssh config. Be sure to rerun (on the head node only)
gpudb_hosts_ssh_copy_id.sh to redistribute the SSH keys if desired whenever the SSH keys are changed |
Troubleshooting
Error Logging
The log file located at /opt/gpudb/core/logs/gpudb.log should be the
first place to check for any system errors. Any issues which would prevent
successful start-up of Kinetica will be logged as ERROR in the log.
Consequently, running the following command will return enough information to
provide a good starting point for further investigation:
grep ERROR /opt/gpudb/core/logs/gpudb.log | head -n 10