Note
This documentation is for a prior release of Kinetica. For the latest documentation, click here.
All of your user and role management can be completed using GAdmin.
Important
The Security section is only available to users with the system_admin or system_user_admin permission.
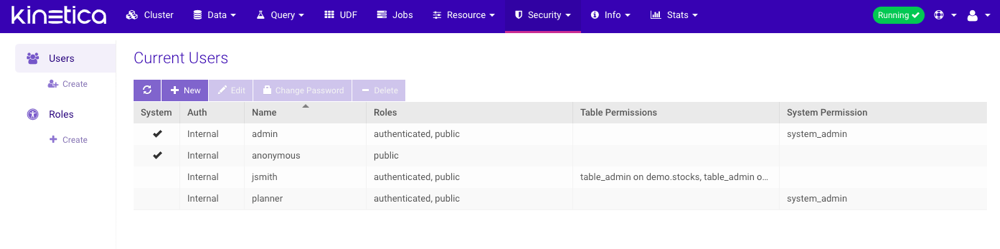
Users
The Users page lists the users in the system, whether they're internal or externally authenticated, and a brief window into their access rights.
Creating Users
When Kinetica has been configured to authenticate and/or authorize users, user accounts can be created to allow access based on specific needs. See Security Configuration for details on different use cases.
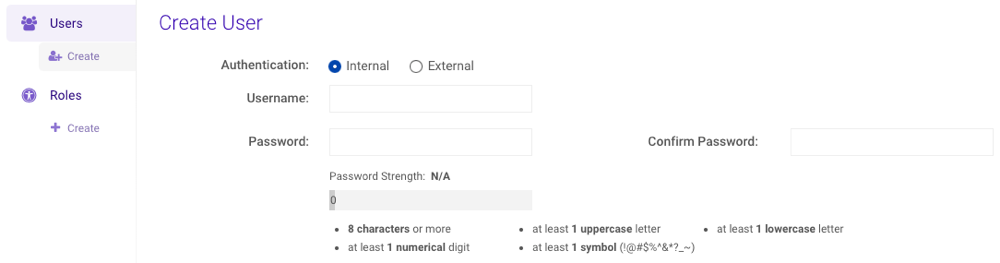
Create a New User Account
From , click Create under Users on the left-hand menu or New above the user list.
Select the type of Authentication. More information on the authentication types can be found under Security Concepts.
Type a username into the User field and a password into the Password field, meeting the password strength requirements listed. Additional requirement details can be found under Security Concepts
Important
Passwords are required for Internal users only
Type the password again in the Confirm Password field.
Select Roles
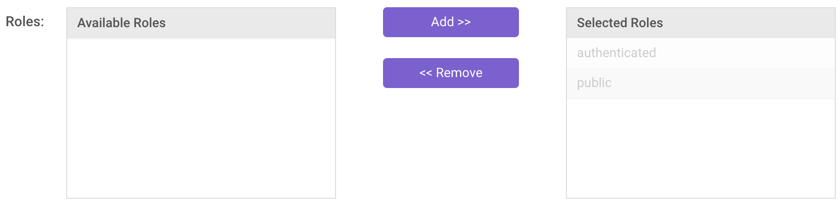
- Add or remove roles as necessary in the Member of Roles
section:
- Add: Click a role in the Available Roles list and then click Add >>.
- Remove: Click a role in the Selected Roles list and then click << Remove.
- Add or remove roles as necessary in the Member of Roles
section:
Select Permissions
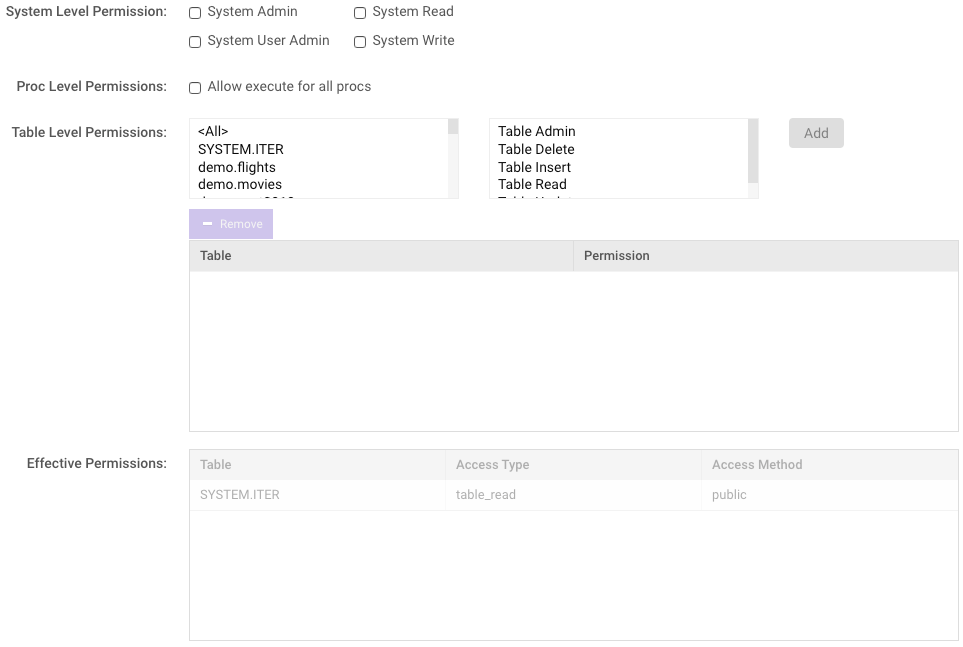
- Check one or more system-level permissions, as necessary.
- Select the Proc Level Permissions box as necessary if allowing the user to execute all procs in the system (proc_execute permission). Review User-Defined Functions Overview for more information on procs and UDFs.
- In the next section,
table-level permissions can be
managed, controlling access to individual database schemas, tables, &
views. The permission-to-object association will be displayed below the
selection boxes, and the Effective Permissions table will be
updated accordingly. Note that the Table Admin permission allows a user
full access on a table.
- Add: Select a schema, table, or view in the left list and a permission in the right list, and then click Add.
- Remove: Select an existing object-permission association in the list of active permissions and click Remove.
Resource Group
- Select a Resource Group from the drop-down menu. Consult Resource for more information on configuring resource groups in GAdmin.
Default Schema
- Select a Default Schema from the drop-down menu. Consult Schemas for more information on schemas.
Click Create.
Editing Users
Existing users can have their roles, permissions, resource group, and default schema updated.
Edit a User Account
- From , select a user to edit and click Edit.
Update Roles
- Add or remove selected roles as necessary in the
Member of Roles section:
- Add: Click a role in the Available Roles list and then click Add >>.
- Remove: Click a role in the Selected Roles list and then click << Remove.
- Add or remove selected roles as necessary in the
Member of Roles section:
Update Permissions
- Check/uncheck one or more system-level permissions, as necessary.
- Check/uncheck the Proc Level Permissions box as necessary if allowing/disallowing the user to execute all procs in the system (proc_execute permission). Review User-Defined Functions Overview for more information on procs and UDFs.
- In the next section,
table-level permissions can be
managed, controlling access to individual database schemas, tables, &
views. The permission-to-object association will be displayed below the
selection boxes, and the Effective Permissions table will be
updated accordingly. Note that the Table Admin permission allows a user
full access on a table.
- Add: Select a schema, table, or view in the left list and a permission in the right list, and then click Add.
- Remove: Select an existing object-permission association in the list of active permissions and click Remove.
Update Resource Group
- Update the Resource Group from the drop-down menu. Consult Resource for more information on configuring resource groups in GAdmin.
Update Default Schema
- Update the Default Schema from the drop-down menu. Consult Schemas for more information on schemas.
Click Save.
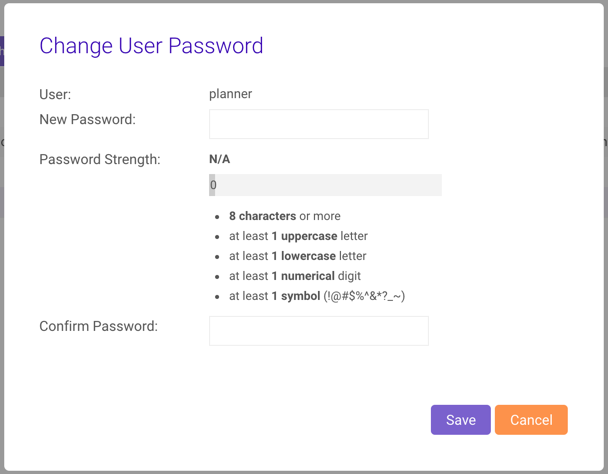
Changing Passwords
Existing users can have their passwords changed by administrators with either the system_admin or system_user_admin permission. To change a user's password:
- From , select a user whose password will be changed and click Change Password
- Type the password into the New Password field, meeting the password strength requirements listed. Additional requirement details can be found on Security Concepts
- Type the password again in the Confirm Password field
- Click Save.
Deleting Users
An administrator can also delete a user from the database. This will not remove any database objects created by the user (schemas, tables, groups, etc.), nor will it remove the user from any external user store (LDAP, etc.).
To delete a user:
- From , select a user to delete and click Delete.
- At the Delete User prompt, click Remove.
Roles
The Roles page lists the roles in the system, the role memberships (both containing & contained), and a brief window into their permissions.

Creating Roles
When Kinetica has been configured to authenticate and/or authorize users, user accounts can be created to allow access based on specific needs. See Security Configuration for details on different use cases.
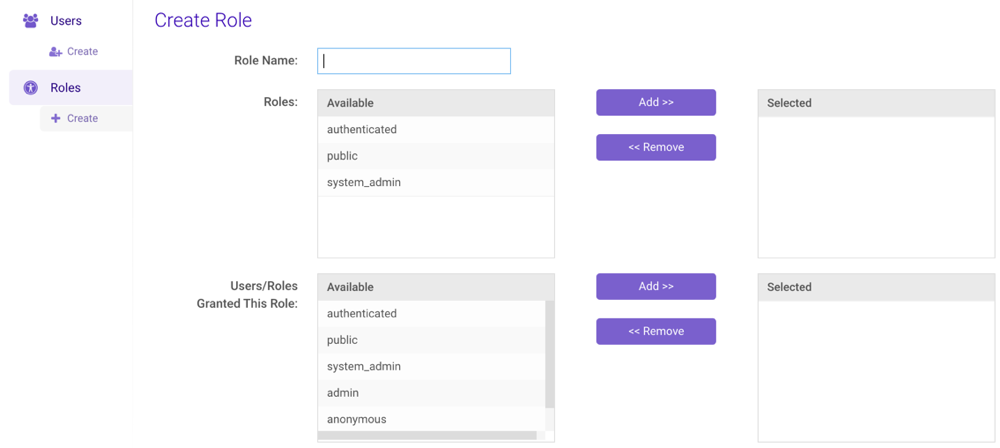
Create a New Role
- From , click Create under Roles on the left-hand menu or New above the role list.
- Type a name for the role into the Role field. Additional requirement details can be found on Security Concepts
Apply and Grant Roles
- In the Roles section, apply existing roles to the new role:
- Add: Click a role in the Available list and then click Add >>.
- Remove: Click a role in the Selected list and then click << Remove.
- In the Users/Roles Granted This Role section, apply the new
role to existing user(s) and/or role(s):
- Add: Click a role in the Available list and then click Add >>.
- Remove: Click a role in the Selected list and then click << Remove.
- In the Roles section, apply existing roles to the new role:
Select Permissions
- Check one or more system-level permissions, as necessary.
- Select the Proc Level Permissions box as necessary if allowing the role to execute all procs in the system (proc_execute permission). Review User-Defined Functions Overview for more information on procs and UDFs.
- In the next section,
table-level permissions can be
managed, controlling access to individual database schemas, tables, &
views. The permission-to-object association will be displayed below the
selection boxes, and the Effective Permissions table will be
updated accordingly. Note that the Table Admin permission allows a user
full access on a table.
- Add: Select a schema, table, or view in the left list and a permission in the right list, and then click Add.
- Remove: Select an existing object-permission association in the list of active permissions and click Remove.
Resource Group
- Select a Resource Group from the drop-down menu. Consult Resource for more information on configuring resource groups in GAdmin.
Click Create.
Editing Roles
Existing roles can have their permissions, users & roles assigned to, and resource group.
Edit a Role
- From , select a role to edit and click Edit.
Apply and Grant Roles
- In the Roles section, apply other existing roles to the role:
- Add: Click a role in the Available list and then click Add >>.
- Remove: Click a role in the Selected list and then click << Remove.
- In the Users/Roles Granted This Role section, apply the
role to other existing user(s) and/or role(s):
- Add: Click a role in the Available list and then click Add >>.
- Remove: Click a role in the Selected list and then click << Remove.
- In the Roles section, apply other existing roles to the role:
Update Permissions
- Check/uncheck one or more system-level permissions, as necessary.
- Check/uncheck the Proc Level Permissions box as necessary if allowing/disallowing the role to execute all procs in the system (proc_execute permission). Review User-Defined Functions Overview for more information on procs and UDFs.
- In the next section,
table-level permissions can be
managed, controlling access to individual database schemas, tables, &
views. The permission-to-object association will be displayed below the
selection boxes, and the Effective Permissions table will be
updated accordingly. Note that the Table Admin permission allows a user
full access on a table.
- Add: Select a schema, table, or view in the left list and a permission in the right list, and then click Add.
- Remove: Select an existing object-permission association in the list of active permissions and click Remove.
Update Resource Group
- Update the Resource Group from the drop-down menu. Consult Resource for more information on configuring resource groups in GAdmin.
Click Save.
Deleting Roles
An administrator can also delete a role from the database. This disassociates the role from any users or other roles that are currently associated with it. Roles in any associated external user stores (LDAP, etc.) will be unaffected.
To delete a role:
- From , select a role to delete and click Delete.
- At the Delete Role prompt, click Remove.