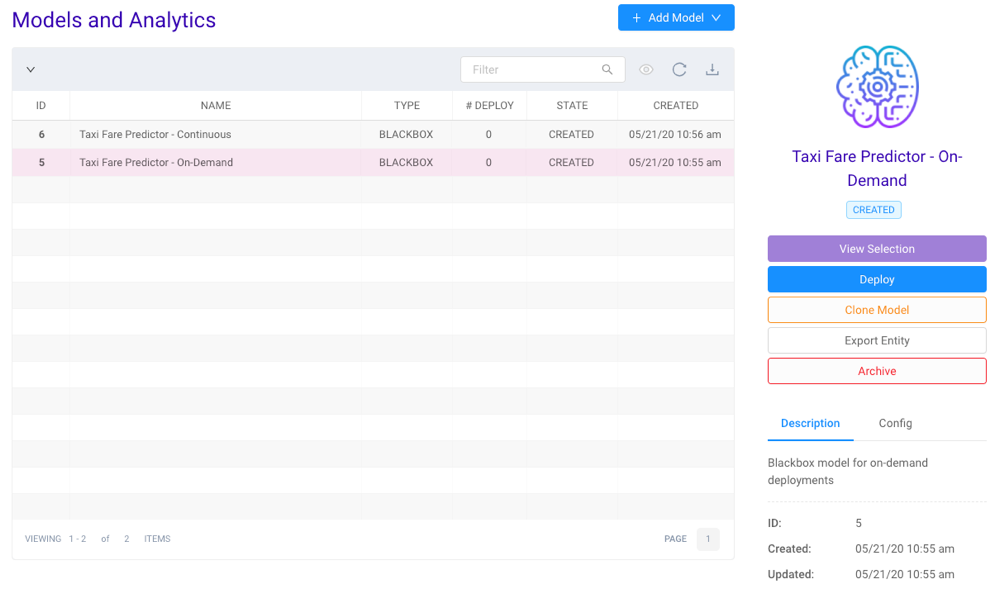
Models + Analytics
A model is a mathematical or programmatical representation of a real-world process.
- Point to + Add Model then click one of the options to begin the
model setup/import process.
- New Blackbox -- create a new Blackbox model
- Type into Filter to filter down the models
- Click
 to display any archived models.
 - Click
 to refresh the table
 - Click
 to export the table's values as JSON or CSV
 - Click an existing model to display additional actions.
BLACKBOXmodels:- Click View Selection to open the Model Details page
- Click Deploy to deploy the model
- Click Clone Model to clone the model
- Click Export Entity to export the model as a JSON object
- Click Archive to archive the model; it will be hidden from the list of models
- Click Description / Configuration to review summary information for the model
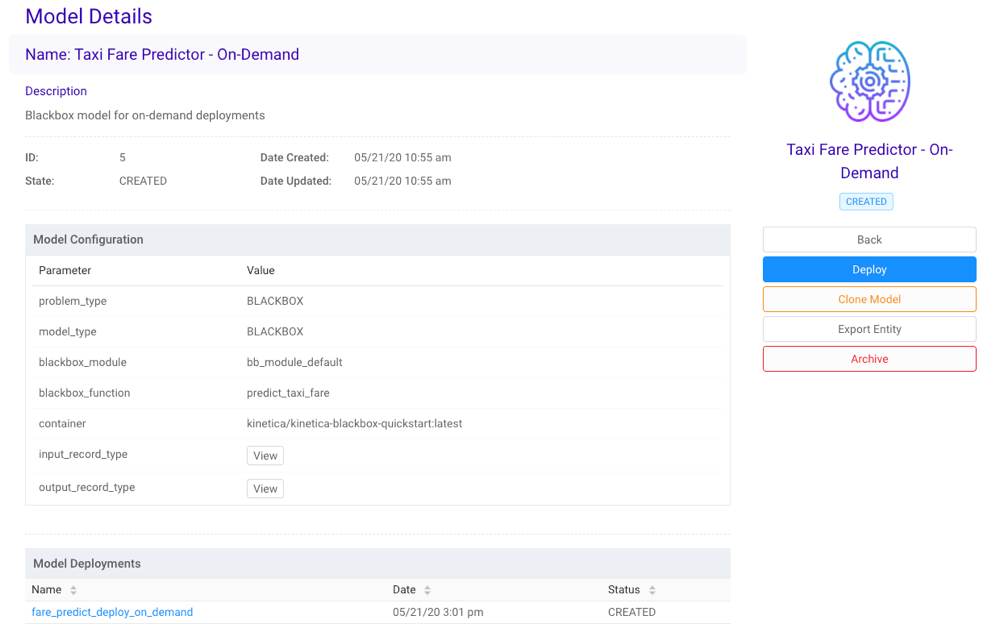
Details
The Model Details page provides a detailed look at a given model, including configuration information, feature set, training and test datasets, and any deployments. Available actions depend on the type of model being detailed.
BLACKBOXmodels:- Click Back to return to the Models page
- Click Deploy to deploy the model
- Click Clone Model to clone the model
- Click Export Entity to export the model as a JSON object
- Click Archive to archive the model; it will be hidden from the list of models
- If the model has been deployed previously, click the deployment's name in the Model Deployments table to open the Deployment Details
Model Creation
New Blackbox Model
After opting to create a new Blackbox model, two paths are available:
Inspect Docker Container -- inspect an existing Docker container (one that is already in a Docker repository), select an available module/function, and automatically import the model
- From the Models and Analytics page, click
- Under Inspect Docker Container, optionally search for and select a Docker Registry credential
- Provide a Docker container URI (e.g.,
<repo-name>/<image-name>:<tag>) - Click Inspect. AAW will pull the container's functions
- Optionally, click View to display details about a given function
- Under the desired function, click Import. AAW will automatically configure the Blackbox model
- Optionally, adjust the Blackbox model configuration fields as necessary
- Click Create
Create a Blackbox Model Manually -- start from a blank template and provide various parameters to manually create and import a Blackbox model
Note
Models can be created manually from existing containers as well; this option provides more manual control over the model import process
- From the Models and Analytics page, click .
- Under Create a Blackbox Model Manually, click Create.
- Provide a Model Name.
- Optionally, provide a Model Description.
- Provide a Blackbox Docker Container repository URI or opt to create a
Blackbox model container.
- If a Blackbox model has already been created using the
Kinetica Blackbox SDK
and published to a Docker repository, provide the URI in the following
format:
<repo-name>/<image-name>:<tag>, e.g.,kinetica/kinetica-blackbox-quickstart:latest - If opting to create a Blackbox model container automatically using
AAW, click + New Container.
- Provide the Docker Repository Name.
- Optionally, provide the Docker Repository Description.
- Optionally, upload a Requirements File.
- Upload the Module File (must be a Python file).
- Provide the Module Function name from the Module File.
- Select a Docker credential.
- Click Create.
- If a Blackbox model has already been created using the
Kinetica Blackbox SDK
and published to a Docker repository, provide the URI in the following
format:
- Provide a Module and Function from the model
- For Input Columns:
- Click Add Input Column to create input columns.
- Provide a Column name and Type.
- For Output Columns:
- Click Add Output Column to create output columns.
- Provide a Column name and Type.
- Click Create.
Model Deployment
After creating a model, a deployment can be created from the Models + Analytics page or the Model Details page.
Select a model from the Models + Analytics page or open the Model Details page.
Click Deploy in the right-hand menu.
Provide a Name for the deployment.
Optionally, provide a Description for the deployment.
Optionally, select a Featureset.
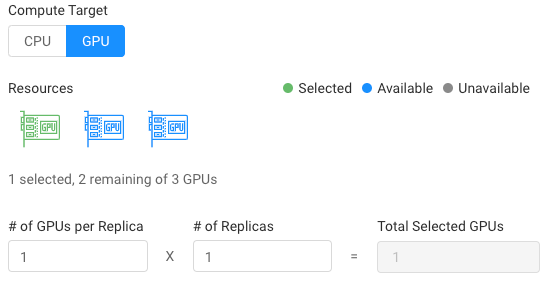
Select a compute target:
If selecting CPU, set the number of replicas of the model to deploy.
If selected GPU, set the number of GPUs used per replica and the number of replicas of the model to deploy. The Resources graphic will update accordingly.
Select if the deployment should be available for audits (Persist Audit):
- True, the deployment results will be available in any audits
- False, the deployment results will not be available in any audits
Tip
Deployments with Persist Audit set to False should achieve better performance
Select a Mode. See Deployments for more information on the different types of modes.
- If selecting On-Demand, skip to the next step.
- If selecting Continuous or Batch, select a Source Table from the drop-down menu and provide an Output Table name.
If Continuous mode is selected, select if the deployment should leverage Multihead I/O for better inference output performance:
- True, the deployment will leverage Multihead I/O
- False, the deployment will not leverage Multihead I/O
Optionally, provide key and value pairs for any Environment Variables available to the model
Click Deploy. The model must then be started via the Deployments interface.