Managing Kinetica with KAgent
After at least one cluster has been initialized and Kinetica has been installed, cluster management is available using the KAgent user interface (UI) or command line interface (CLI).
UI
The KAgent UI is usually available on port 8081
of the desired machine, so it can be accessed via http://<kagent-host>:8081.
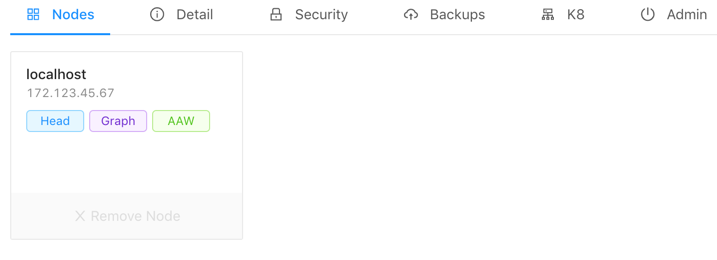
Clusters
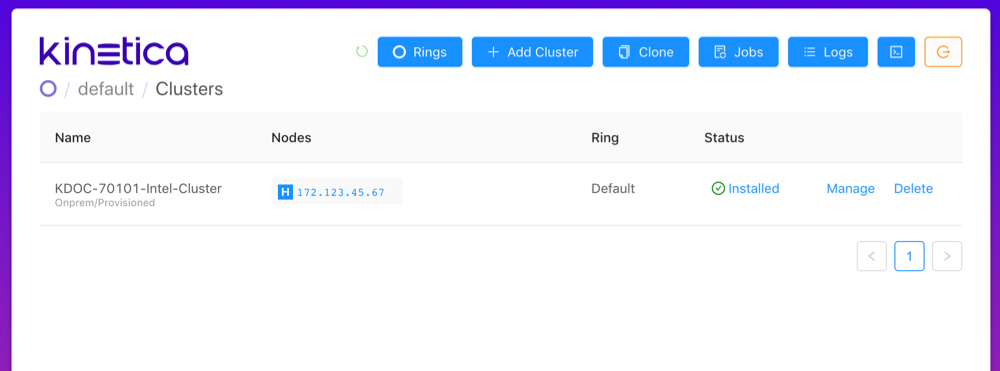
The home page for the KAgent management UI is the Clusters page.
- Click Rings to display the rings related to the clusters managed by this instance of KAgent.
- Click Add Cluster to begin adding a cluster. See KAgent for more information.
- Click Jobs to view KAgent jobs.
- Click Logs to view KAgent logs.
- Click
 to logout of KAgent.
 - Click
 to open the KAgent console log
 - Click the
 icon in the Nodes column to open a browser
tab to the head node's Admin Application (GAdmin --
icon in the Nodes column to open a browser
tab to the head node's Admin Application (GAdmin --
http://<host>:8080) - Click Manage next to a cluster to open the management options for the cluster.
- Click Delete to remove the cluster from KAgent. This will not uninstall Kinetica or any other services.
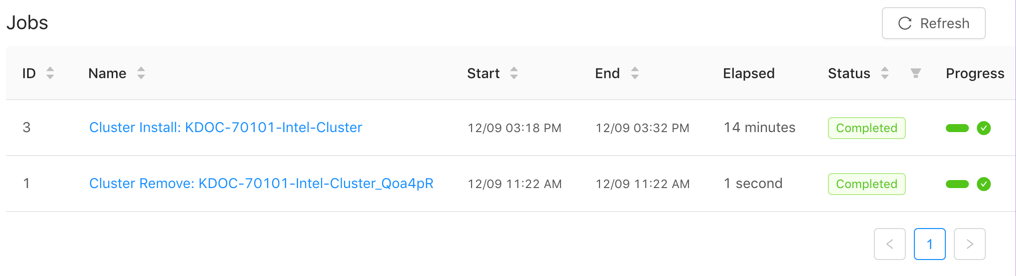
Jobs
The Jobs page displays all historical and currently active jobs. Click X to cancel a running job.
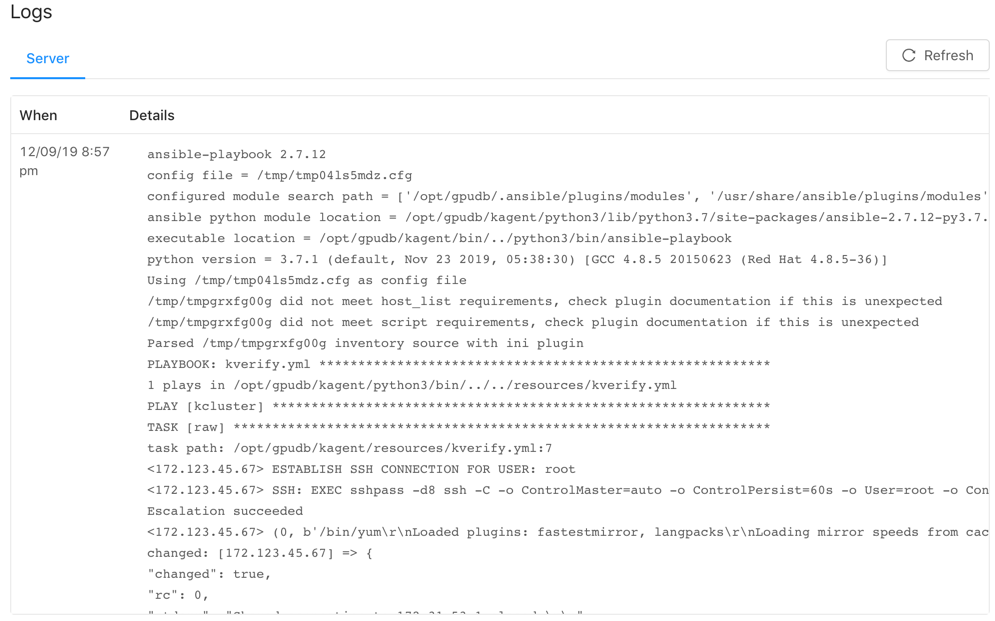
Logs
The Logs page hosts the logs for each KAgent command and result during the verification and installation processes as well as any later interactions with KAgent. Click Clear Activity to clear the selected log and click Refresh to refresh the selected log.
Console
The Console window hosts a running log of KAgent's activity while it interacts with the local/provisioned instances to install or upgrade Kinetica and its components, create backups, and more. Click Show Details to display detailed information about each interaction.

Manage
Each cluster can have backups scheduled, Kubernetes Docker registries configured, additional security options enabled, and more. At any point, click Clusters to return to the home page.
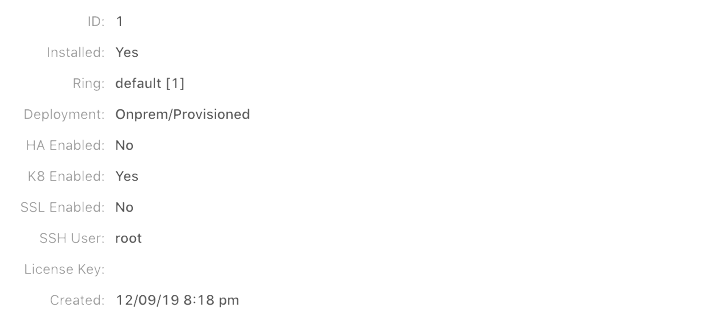
Detail
Detail provides information about the cluster, including ring (HA) information, the state of the cluster, the SSH User input during the installation process, and more.
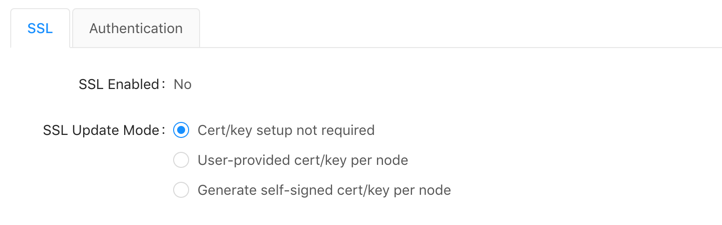
Security
Security provides the ability to adjust the existing security configuration for the cluster. Click Start Over to reset any changes made.
To update the security configuration:
Select an SSL Update Mode:
- Cert/key setup not required -- no SSL certificate/key creation/upload required and no updates to security configuration settings
- User-provided cert/key per node -- user must upload an SSL
certificate and key for each node; Kinetica copies the cert/key pair
to
/opt/gpudb/certs, enables HTTPD, and configures HTTPD to use HTTPS - Generate self-signed cert/key per node -- KAgent generates
a self-signed certificate and key for each node and places it in
/opt/gpudb/certs, enables HTTPD, and configures HTTPD to use HTTPS
Click Update SSL. This will override any existing configuration.
Select an Authentication type and fill the fields as necessary:
- None -- no authentication or authorization
- LDAP -- configures Kinetica to authenticate via LDAP; requires authentication to connect to the database, enables authorization, enables external authentication, automatically creates users in the database for LDAP users, and automatically grants roles in the database to LDAP users
- Active Directory -- configures Kinetica to authenticate via Microsoft Active Directory; requires authentication to connect to the database, enables authorization, enables external authentication, automatically creates users in the database for Active Directory users, and automatically grants roles in the database to Active Directory users
- Kerberos -- configures Kinetica to authenticate via Kerberos; requires authentication to connect to the database, enables authorization, enables external authentication, automatically creates users in the database for Kerberos users, and automatically grants roles in the database to Kerberos users
Note
For more information on security configurations and settings as well as how to manually configure Kinetica for a secure setup, see Security Configuration
Click Update. This will override any existing configuration.
Backups
Backups provides the ability to schedule backups of your entire database. In this section, the system can also be restored from a previous snapshot. Consult Backing Up/Restoring Kinetica for information on backing up Kinetica using KAgent from the command line.
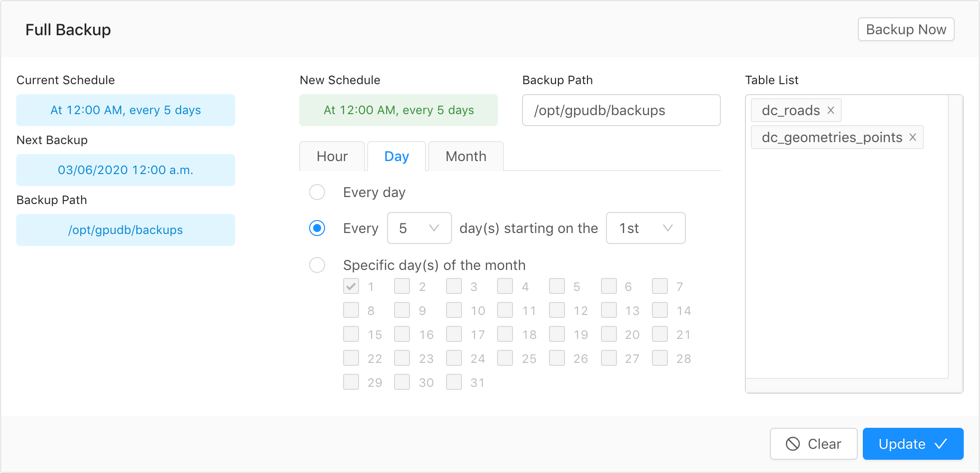
Schedule
To schedule a backup in the future:
Provide a Backup Path. This directory must be accessible to the
gpudbuser and should be local to the head node.Select the Hour, Day, or Month tab.
Select one of the options:
- For backups every hour | day | month
- For backups every
<n>hour(s) | day(s) | month(s) starting at hour | day | month<n> - For backups during specific hour(s) of the day | day(s) of the week | month(s) of the year
Optionally, select as many tables to backup as desired in the Table List.
Warning
Only the records in the tables selected will be available upon restoring from backup. All other tables that existed at the time of backup will be restored but they will have no records.
Click Update.
To clear an existing scheduled backup:
- Click Clear.
To backup immediately:
Click Backup Now.
Optionally, provide a Backup Path. This directory must be accessible to the
gpudbuser and should be local to the head node. If no directory is provided,/opt/backupswill be used.Important
If this path provided differs from the path for the scheduled backups, users will not be able to restore from this backup via KAgent.
Optionally, select as many tables to backup as desired in the Table List.
Warning
Only the records in the tables selected will be available upon restoring from backup. All other tables that existed at the time of backup will be restored but they will have no records.
Click Backup Now.
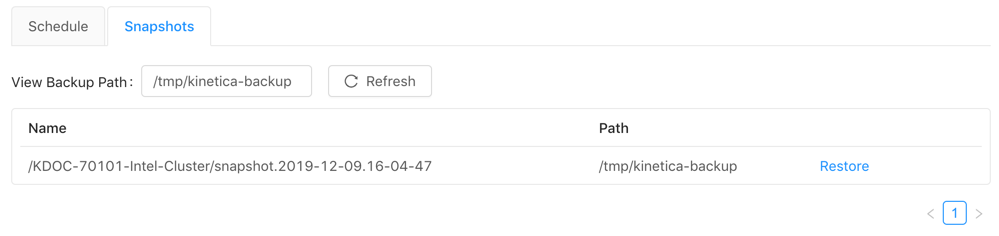
Snapshots
By default, Snapshots displays all backups in the set backup path directory.
- Click Restore and confirm to restore the database from a snapshot.
- Provide a backup directory path to View Backup Path and click Refresh to display any backups located in the given path.
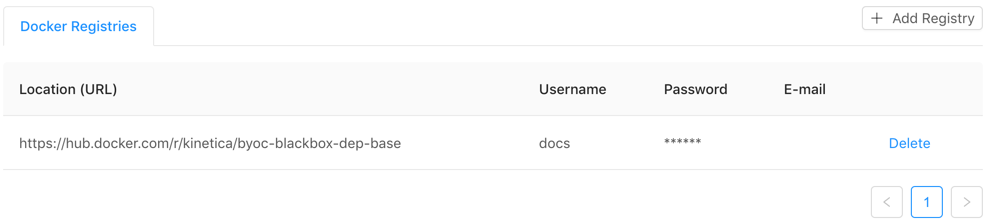
K8
K8 provides the ability to manage and add Docker registries for use with the Active Analytics Workbench (AAW). Docker registries can only be added if a K8 config is available on the cluster.
To add a registry:
- Click Add Registry.
- Provide a Location (URL) for the registry and a Username, Password, and E-mail used to access the registry.
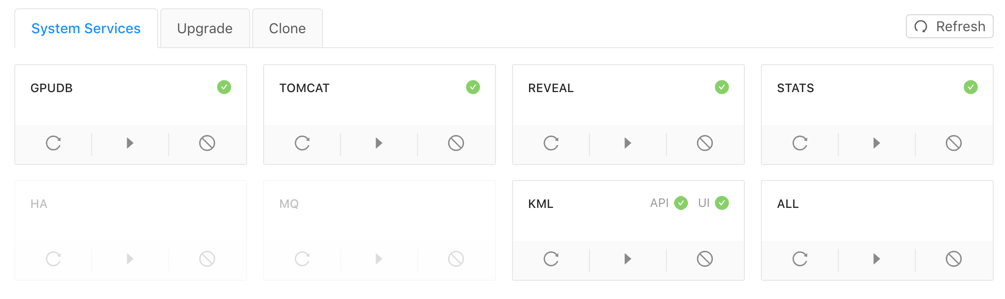
Admin
Admin provides the ability to start, stop, or restart any of the Kinetica-managed services. KAgent must first check for the installed services across the cluster, then each service can be managed. The Admin tab also provides access to the Upgrade and Clone utilities.
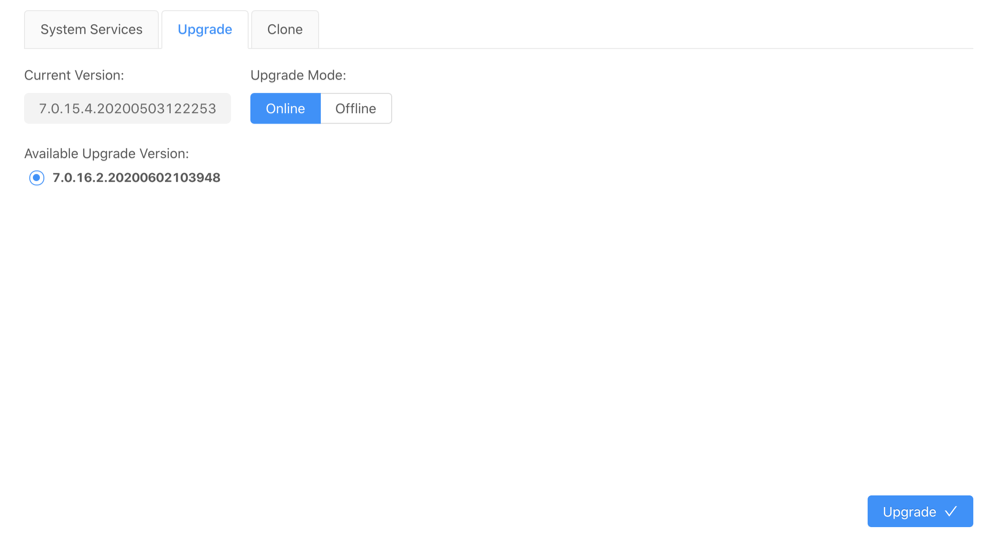
Upgrade
Upgrade displays various Kinetica versions to upgrade to from the public Kinetica repository. If the latest version is installed, no other versions are able to be installed. Review Upgrading Kinetica (KAgent - On Premise) for more information.
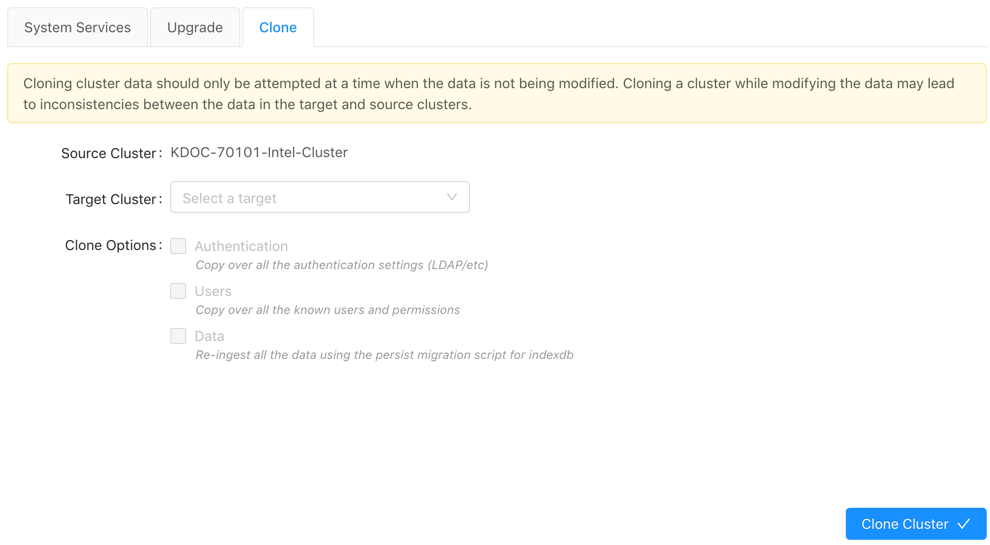
Clone
Clone provides the ability to clone the current cluster's authentication settings, users, and/or data to another cluster. To clone a cluster:
Select a Target Cluster from the drop-down menu.
Select the Clone Options:
- Authentication: the source cluster's authentication settings (LDAP, Kerberos, etc.) will be cloned to the target cluster
- Users: the source cluster's users and permissions setup will be cloned to the target cluster
- Data: the source cluster's data will be cloned to the target cluster
Click Clone Cluster.
Important
Cloning a cluster should be performed during downtime as cloning a cluster while modifying any of the related data can lead to inconsistencies between the two clusters.